


Thank you for your purchase of Kondex KX7 Pro Series concaves! With each concave, you should have received a printed version of these installation instructions and hardware to mount the concaves.
The items below are what you will need for KX7 concave installation.
- Installation instructions
- Hardware for mounting concaves in combine
 Concave assemblies are heavy and awkward to handle. Another person may be needed to remove and install concave assemblies.
KX7 Pro Series Recommendations
Settings and Maintenance
KX7 Pro Series Setting Recommendations
Note: setting recommendations provided assume all other combine settings are adjusted accordingly and functioning properly.
- Reference all combine settings in your combine owner’s manual specific to the crops you are harvesting.
- All concave and rotor speed adjustment logic remains the same. Recommendations below represent what has been used in the field across different crops and conditions. Note: harvesting conditions can drastically change these recommendations.
- Concave Clearance: Typically, KX7 Pro Series users harvest 1-5 more open on concave clearance than they ran with OEM concaves, specific to the crop being harvested.
- Conditions can significantly change this setting recommendation.
- If you were not previously running OEM concaves (rather using other aftermarket concaves), these reference points may not be valid.
- Rotor Speed: Typically, KX7 Pro Series users can run on the lower end of recommended rotor speed, specific to the crop being harvested.
- Conditions can significantly change this setting recommendation.
- If you were not previously running OEM concaves (rather using other aftermarket concaves), these reference points may not be valid.
- Grain Window Opening: MaxThresh™ Pro grain window opening recommendations vary by header and crops. Use the starting recommendations below. Contact your KX7 Pro Series dealer or Kondex support (KX7@kondex.com) for other configuration settings.
Stripper Header: Cereal Grains
| Left | Right | |
|---|---|---|
| Row 1 | Closed | Closed |
| Row 2 | 50% open | Closed |
| Row 3 | 75% open | 50% open |
Grain Header: Cereal Grains
| Left | Right | |
|---|---|---|
| Row 1 | 50% open | Closed |
| Row 2 | 75% open | 50% open |
| Row 3 | 100% open | 100% open |
For more exact opening measurement, it is recommended to use a set of internal hex key wrenches. For reference, 25% open = 6mm hex size; 50% open = 8.5mm hex size; 75% open = 10.5mm hex size, measured at the smallest distance in the slot (see image below).
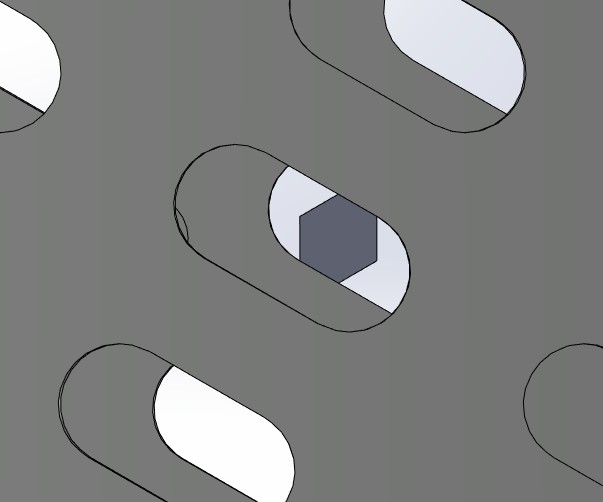
The principle of the MaxThreshTM Pro grain window opening is to completely block off grain flow (while closed), or limit grain flow to the seed size only - thus reducing the grain flow or preventing unthreshed grain from moving through the concave.
KX7 Pro Series Maintenance Recommendations
Prior to operation, inspect concaves for damaged modules, loose or missing hardware, or excessive wear. If you notice any of these issues, correct as needed to maintain optimal performance.
Tools Needed by Make
John Deere S7/S/STS Combines
Installation Tools
- 15mm wrench and socket
- 16mm wrench and socket
- 18mm wrench and socket
- 19mm wrench and socket
- 6mm hex key wrench
Installation Instructions by Make
John Deere S7/S/STS Combines
KX7 Pro Series Installation Instructions
- Reference all concave removal and installation procedures in your combine owner’s manual.
- In your combine owner’s manual, locate and turn to the concave removal section.
- Remove current concaves from the combine, following concave removal procedures in your combine owner’s manual.
- Each removed concave will be replaced with a KX7 Pro Series frame, as well as left and right KX7 Pro Series concave modules.
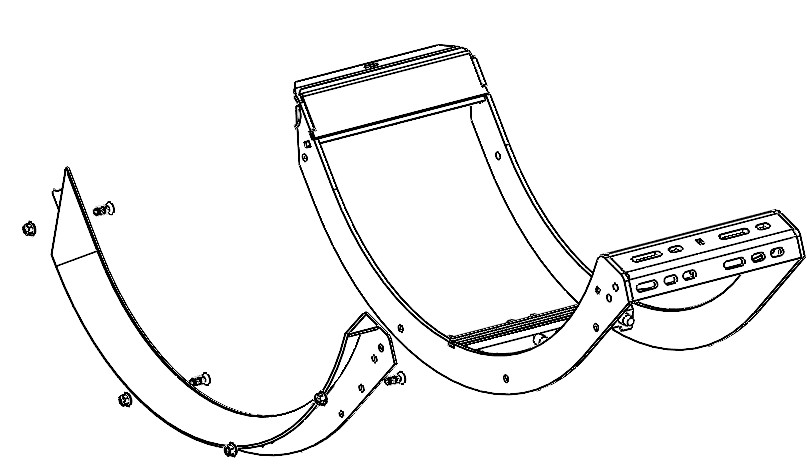
- Install front ramp (F00-112) on the front-position of the KX7 Pro Series frame (F00-113) (See Figure 1).
FIGURE 1: Ramp to frame installation
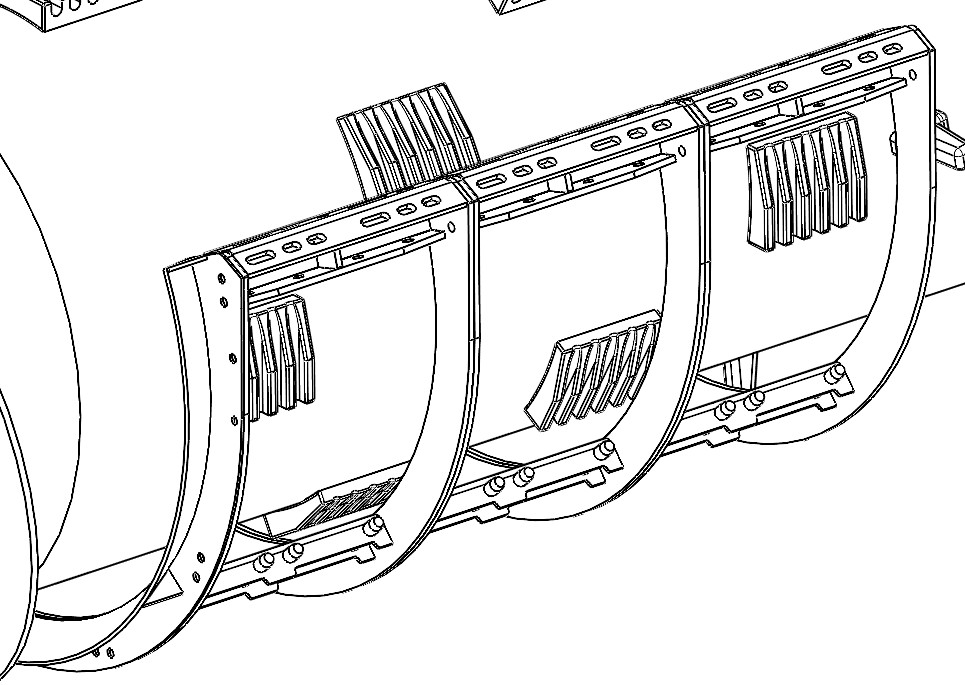
- Install the empty base frame (F00-113) into the machine. It is recommended that you put all three frames into the machine prior to adding concave modules (See Figure 2).
FIGURE 2: Frame(s) installation
-
Once all empty frames are installed in the machine, tighten the bolts on the z-bar, starting with the top row of bolts and finishing with the bottom row of bolts. Then move to the right side of the machine and install the three concave latch handles (aka ice pick pins) on the right side of the machine to secure the frames (See Figure 3). Once this is done, you are ready to install the KX7 Pro Series modules.
FIGURE 3: Concave latch installation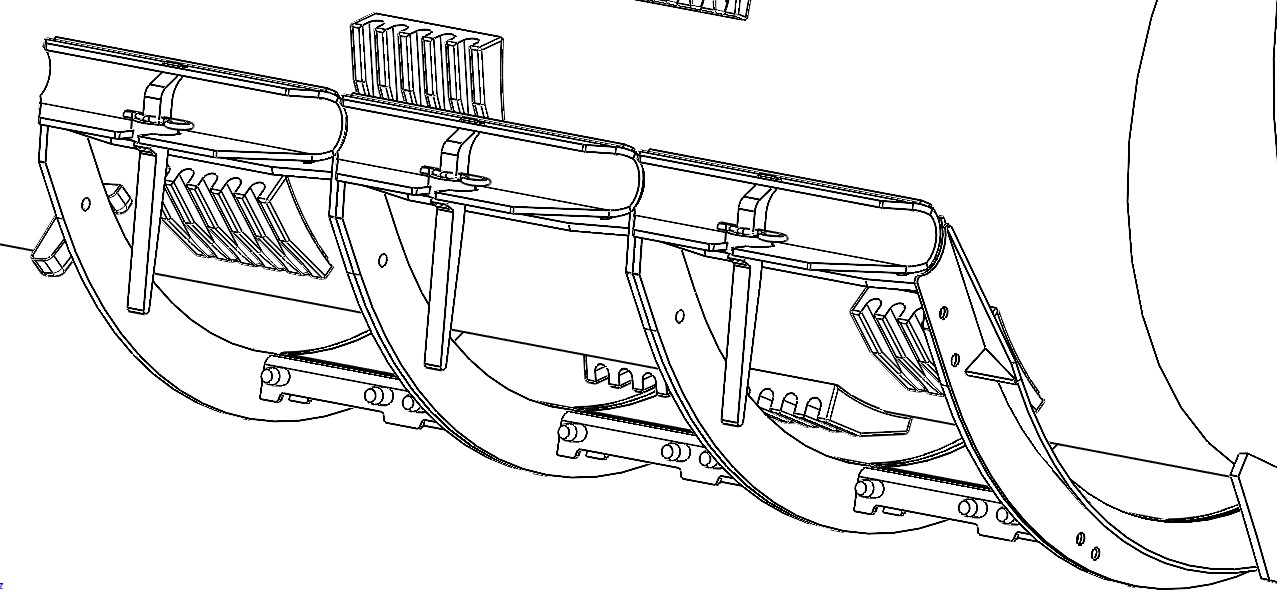
- Install front ramp (F00-112) on the front-position of the KX7 Pro Series frame (F00-113) (See Figure 1).
- Install KX7 Pro Series concave modules in the configuration matching the KX7 kit that was ordered, typically MaxThreshTM Pro concaves are in the front position(s) followed by MaxRoundTM concaves.
(Note: The arrow on the MaxThreshTM Pro concaves indicates the DIRECTION OF CROP FLOW, not the direction of the module (See Figure 4)).
(Note: Configurations may vary depending on region, crop conditions, and dealer recommendations.)
FIGURE 4: MaxThreshTM Pro module with arrow circled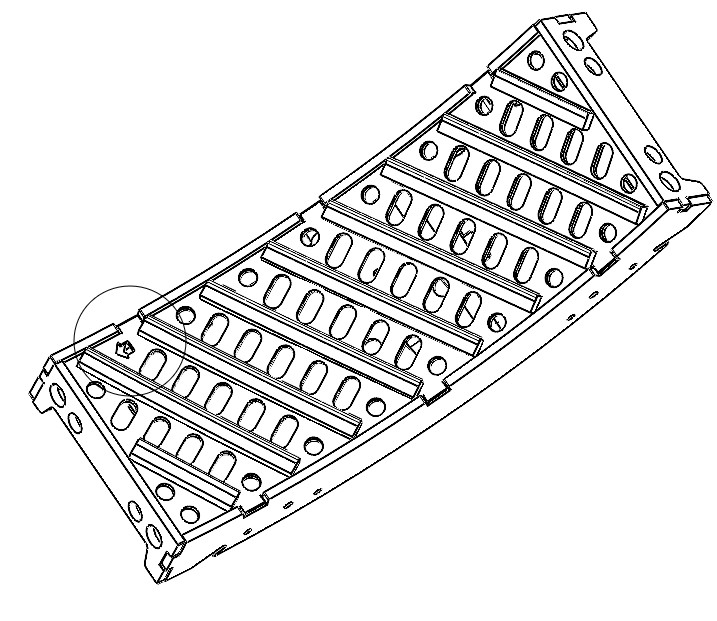
- Install the KX7 Pro Series modules in the front of the machine working towards the rear of the machine.
- Set the desired module into the KX7 Pro Series frame by setting the module onto the two alignment pins towards the center of the machine (See Figure 5). Next, lift the module up to the frame and bolt it to the frame already installed using the two bolts provided. Install the rest of the modules according to your specific configuration (see Figure 6).
FIGURE 5: Module installation - alignment pins circled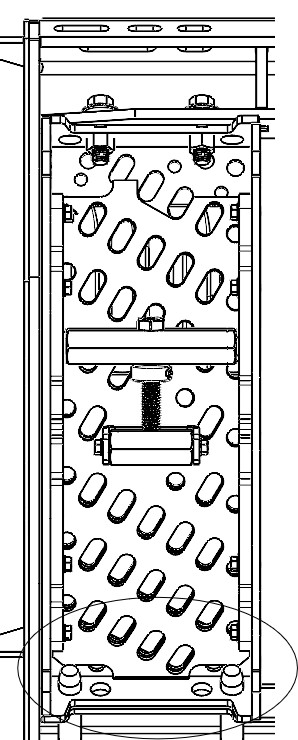
FIGURE 6: Module installation - mounting hardware circled
- Tighten all mounting hardware and torque to 53 N•m (39 ft-lb).
- Once KX7 Pro Series concaves are installed, level and zero your concaves following the procedure in your owner's manual.
FIGURE 7: KX7 Pro Series ramp, frame, and 12 modules installed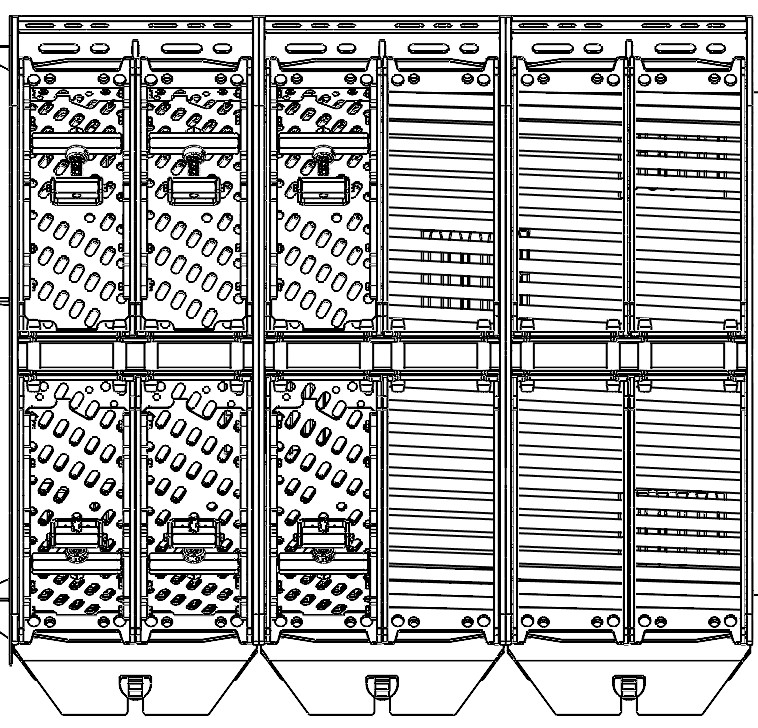
-
Reference your owner’s manual to confirm that you have completed all steps after concave installation.
-
Once all the KX7 Pro Series modules are installed and you have leveled and zeroed the concaves as instructed in the combine owner's manual, adjust the grain window of each MaxThreshTM Pro to the desired openness for your harvest conditions.
FIGURE 8: Grain window adjustment - adjusting bolt head circled (shown with windows fully open)
FIGURE 9: Grain windows shown partially closed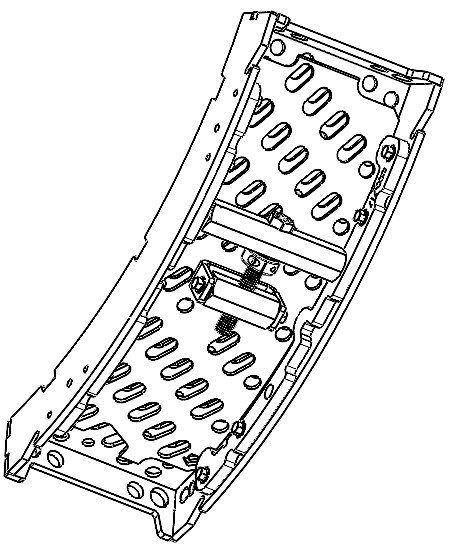
FIGURE 10: Grain windows shown fully closed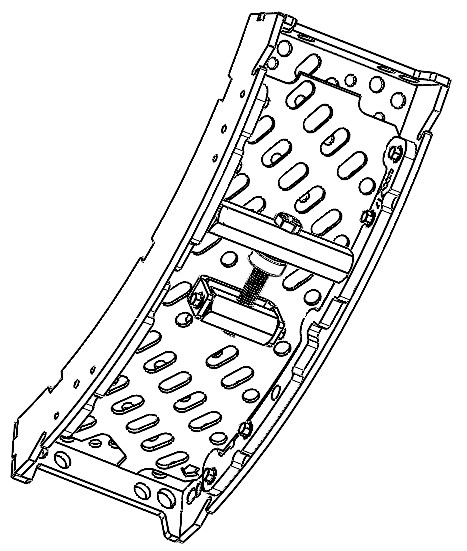
Typical adjustment time is approximately 5 minutes per configuration change. No tools beyond a wrench are required. No concave removal is needed.
| NOTE: The grain window adjustor is not a cover — it is a system-level component. Do not remove it from the module. Adjust only as described above. |